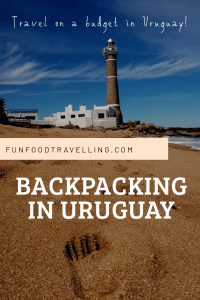
Backpacking in Uruguay, traveling there on a budget
Uruguay was our second travel destination in South America after two months of backpacking in Argentina.
We were expecting beautiful beaches and modern and expensive places. We were going on a budget to Uruguay, one of the most expensive countries in South America.
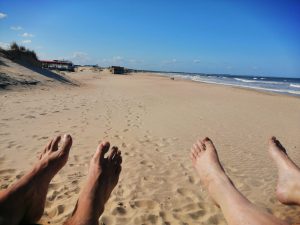
Beautiful beach Uruguay
This post may contain affiliate links. We earn a small commission if you purchase something through the affiliate link.
Now you are asking the question, is backpacking in Uruguay worth it and even possible?
And the answer is YES!
We spend over two weeks backpacking in Uruguay and in this travel guide we are going to share with you all the tips and itineraries.
Before we deep dive into our travel itinerary, here is our post about travel safety which can be useful when travelling to South America.
Our Tip: Wise is a great card when you are travelling to a country with a different currency than yours. We use this online bank during our trips and we never had problems, even in remote places around the world.
Grab our Travel tag and Let the adventure begin!
So first, how did we get from Buenos Aires to Montevideo?
Getting from Buenos Aires to Montevideo/ Colonia de Sacramento
From Buenos Aires, you have four options to go to Montevideo. By ferry, by bus, by car and of course by plane.
By Ferry
The ferry option is more expensive but it is only two hours ride. Also, you have to get tickets quite early as there are only three companies which support this route and they fill up very fast.
The three companies offering this route are:
By Bus
By bus, it is the cheapest option but also the longest one. As we were backpacking in Uruguay, we opted in for an overnight trip which takes around 8h. The bus goes from 9.30 pm and arrives at 5.30 am in Montevideo.
There are three companies with a bit different schedule however all of them are overnight buses and you arrive very early in the morning to Montevideo.
The bus company we used was Cauvi and the one-way ticket cost approx 1450 UYU (35 EUR in November 2019). The buses, in general, are very comfortable however you have to get on and off a few times as you have to pass the control at the border.
We arrived in Montevideo at 5.30 am and we decided to continue straight away to Colonia de Sacramento.
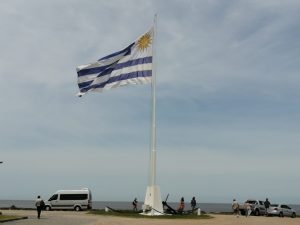
Colonia de Sacramento
By Car
If you have a car it is an easy way to get to Montevideo. You can also take a ferry with your car but you have to pay an extra fee.
By Plane
There are many flight companies that fly daily to Montevideo so if you are in a hurry, this might be your option as the flight takes only 50min.
What to pack for Uruguay?
We prepared our Ultimate Backpacking checklist so check it out to know what to pack for your trip to Uruguay.

Colonia de Sacramento
As we mentioned we arrived in Montevideo by bus and immediately caught a bus to Colonia de Sacramento. We were going to come back to Montevideo later on the way back from the coast.
We caught a bus from Montevideo at 6.50 am and we arrived in Colonia de Sacramento around 10 am. The ticket costs 400 UYU for one person, one way.
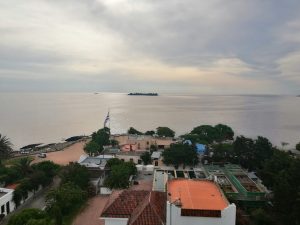
Colonia de Sacramento – view from Lighthouse
Day 1: Exploring Colonia de Sacramento
Colonia de Sacramento is one of the oldest cities in Uruguay and its popular for its historic city center which is part of UNESCO World Heritage.
You can find historic buildings and other monuments like Light House which remain from its time as Portuguese settlement. The city is quite small so we agreed that it would be a perfect getaway for one day trip from Montevideo or Buenos Aires.
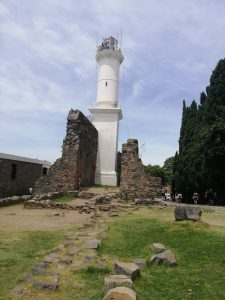
Lighthouse Colonia de Sacramento
Day 2: Beach Time
To be honest, Colonia de Sacramento is a very nice place but quite small, so on our second day, we went to explore a beach near the city center. It was a nice and relaxing day but if you run out of time, we recommend to come just for one day as it will be enough to explore the town.
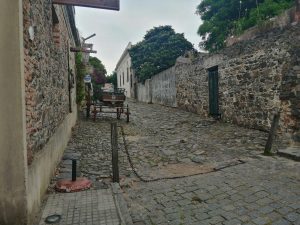
Historical part Colonia de Sacramento
As this is a backpacking guide for Uruguay, we would recommend staying only one night in Colonia de Sacramento as overall the cheapest accommodation in town, wasn’t that cheap.
Where to stay in Colonia de Sacramento
We stayed two nights in Hostel Celestino which was one of the most economical accommodations in Colonia. We stayed in a shared room and they have a nice patio inside the hostel where you can relax in the shadow.
WiFi: bad signal, only around the reception
Location: about 5min walk from Bus Terminal so convenient, 10min walk to the city center
Price: reasonable and the cheapest we found in the town
Extra info: supermarket just next door, convenient location close to the bus station
Getting from Colonia de Sacramento to Punta del Diablo
From Colonia de Sacramento we decided to continue to the Uruguayan coast and go to Punta del Diablo. As we went by bus, we had to go back to Montevideo and then catch a bus to Punta del Diablo.
To make the trip more relaxed, we stayed one night in Montevideo so we also had time to explore the city and try the local food – Chivito ( sandwich with beef steak, ham, bacon, lettuce, tomato, mozzarella cheese, and fried egg).

Chivito in Montevideo
In the morning we caught a bus to Punta del Diablo which takes approx 5h and one-way ticket cost 713 UYU. We used the COT bus company which had wifi onboard so it was very convenient for us and in fact this post was half created on this bus.
Our Tip: Make sure you travel with insurance. We use WORLD NOMADS as according to our knowledge we think it is the most complete travel insurance at the market. We already had some health issues in Bolivia and we had a great support with this company.
Punta Del Diablo
Punta del Diablo (Tip of the Devil in translation) is a small fisherman village on the eastern coast of Uruguay. Despite its size, it is a very popular place during the summer as it has beautiful beaches.
We visited this place just before the high season started so it was almost empty. During the high season, the small village of 1000 inhabitants changes to 30.000 people as it fills with tourists. So if you travelling on a budget in Uruguay, don’t plan your trip here during January and February as you won’t be able to find cheap accommodation.
Day 1 – Day 3: Beach Time
As we stayed in the small house close to the Playa Grande, we spent most of the three days on this beach. It is a long beach which is a bit closed in the end so it was convenient for us when there was a lot of wind. The Atlantic Ocean is very cold however we were able to swim for a short time:)
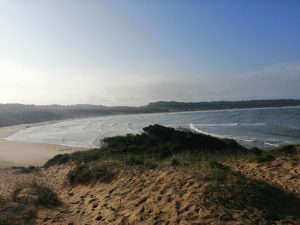
Playa Grande Uruguay
There are other three beaches close to the village and more open so not very recommended with a strong wind. One of them is Playa de la Viuda which has nice sand dunes and is great for surfing, however, we were advised by the owner of the house that sometimes there is a very strong tide which can become dangerous.
Where to stay in Punta del Diablo
Overall we stayed three nights in La Joya del Diablo which is a small house with a kitchen and bathroom. In general, you won’t find many big hotels in Punta del Diablo as most of the accommodations are small houses or apartments.
WiFi: very bad signal
Location: not very close to the center, walking about 20min, close to the Playa Grande
Price: cheap for a small house
Extra info: nice owners, they also borrowed our beach chairs and umbrella, the house is located just a few steps from Bus station number 2 (ask the driver to stop there)
Click here to find more accommodation in Punta del Diablo.
Barra de Valizas
Our next destination was Barra de Valizas as it is on the way to Cabo Polonio. To make our trip easier, we decided to stay one night in Barra de Valizas and then go to Cabo Polonio the next day.
How to get from Punta del Diablo to Barra de Valizas
There is only one bus company from Punta de Diablo to Barra de Valizas, the name is Rutas del Sol. As there is no direct bus to Barra de Valizas, we had to go first to el Castillos city. The bus ride to el Castillos is 90 UYU per person. In el Castillos we had to wait for about an hour for another bus to Barra de Valizas. This ticket costs 63 UYU per person and you arrive approx in 20min.
Day 1: Beach in Barra de Valizas
When we arrived in Barra de Valizas, we left our luggage in the hostel and went directly to the beach. In Barra de Valizas you will find one long and beautiful beach with one particular thing, there is a small Bahia where you can find many small shrimps. We also saw a sea lion getting some food just at the line between the Bahia and the Atlantic Ocean.
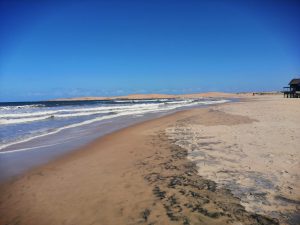
Beach at Barra de Valizas
During the low tide, you can also walk towards the sand dunes while crossing the Bahia. If you continue walking on the sand dunes, you will be able to get to Cabo Polonio in about 3h. We refused to do this trip to walk in the sand with our bag-packs did not seem like a smart idea.
Where to stay in Barra de Valizas
In Barra de Valizas we stayed in Pousada de dos Palmas, which is a quite big house with 5 double rooms inside. The owner is a nice lady and she lives next door.
WiFi: good signal
Location: Be careful when you are checking the location at maps.me as there are two places with the same name. Follow the one which says Pousada de dos Palmas – correct location, it should be around 10min walk from Bus Terminal.
Price: good price for a double room with private bathroom
Extra info: the owner makes homemade cakes for breakfast which was a very nice surprise in the morning
To find more accommodation in Barra de Valizas, see the availability and price right here.
Cabo Polonio
Our next travel destination was Cabo Polonio which is popular for not having wifi and using only sustainable energy. To get there from Barra de Valizas we took a bus with Rutas de Sol and we arrived in Cabo Polonio Terminal in about 15min.
The only way to get to Cabo Polonio village is trough 4×4 vehicles which run from 8.30 am till 8 pm. The 4×4 vehicles are quite adventurous as it is like a big bus with huge wheels and seats on the roof.
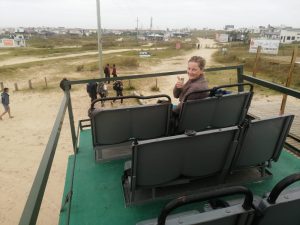
4×4 vehicle in Cabo Polonio
Cabo Polonio is a rustic and mythical village as there is no wifi, no electricity, and a telephone. All buildings are using solar panels or windmills to produce energy. Let’s say it was a detox from the Internet and time spent with others talking about travelling around the world.
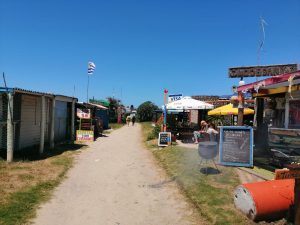
Cabo Polonio center
We should probably mention that Cabo Polonio is not very suitable for backpacking despite the fact that it is a pretty hippie village with a relaxing environment. We visited this place before a high season so the prices were still reasonable. On the other hand, if you come during January or February you might not be able to find accommodation cheaper than 50 EUR/night.
Day 1: Cabo Polonio village
When we arrived in Cabo Polonio, we went to explore the surroundings. There is a nice Light House installed in 1881 and one of the largest reserves of sea lions in the world. We continued our day with a walk on the beach, but it was very windy so we shortly went back to our hostel.
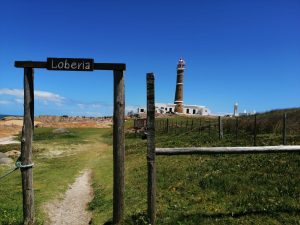
Lighthouse Cabo Polonio
Day 2: Relax
In the end, we came to Cabo Polonio to relax and enjoy nature without being hooked to our phones and the internet. So we did. We were reading, cooking and talking with other people in the hostel, sharing experience, and travel adventures. It was very windy again so we just spend our day doing nothing, it was great!
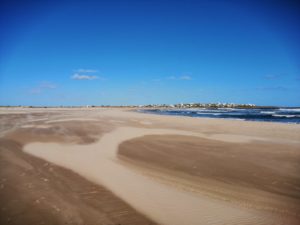
Beautiful beach Cabo Polonio
Where to stay in Cabo Polonio
During the two days, we stayed in Lobo Hostel Bar which is located just a few meters from the Bus stop Cabo Polonio.
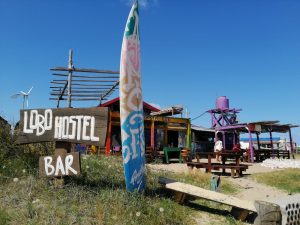
Lobo Hostel Bar in Cabo Polonio
WiFi: NO WIFI
Location: it is a small village so everywhere is a center
Price: expensive
Extra info: There is a restaurant in the hostel so you can get breakfast, lunch or dinner with a craft beer. The craft beer cost was 150 UYU and it was very good.
Find more accommodations in Cabo Polonio by clicking here.
Punta del Este
The next trip on the Uruguayan coastline was Punta del Este. We took a 4×4 vehicle from Cabo Polonio at 11 am and then took another bus to el Castillos. Here we changed to another bus to Punta del Este.
Day 1: Exploring Punta del Este
Punta del Este is a popular city located in the Southern part of Uruguay. Some people call this city “the Monaco of the South” thanks to its beautiful beaches, glamorous parties, luxury accommodations and a lot of options for shopping.
You might think, that sounds real, not suitable for backpacking in Uruguay. Well, we found the economic way how to explore this place as well.
To be honest, we were not so keen on visiting Punta del Este as we though we only find luxury buildings and 5-star hotels. Well, we were surprised as if you just leave the city behind, you can explore different places and its totally worth it.
Day 1: Punta del Este city
During our first day, we went to see the popular sculpture La Mano created by Chilean artist Mario Irarrazabal. It consists of five fingers emerging from the sand and you can find it at Brava beach near the main bus Terminal in Punta del Este.
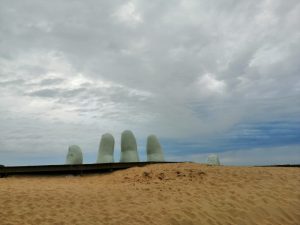
La Mano Punta del Este
We also did a short walk in the city center and continue to the Punta del Este coastline which is divided between regions: Brava and Mansa. The line between the two regions is at the end of the Rio de Plata and the beginning of the Atlantic Ocean and you can recognize the difference quite easily. The Brava beach has white and fine sand, however, Mansa beach has thick and golden sand.
It started to rain and it was getting dark, so we decided to go back to the hostel and relax. During our first night, we met a friendly couple Irene and Gabrielle who invited us to join them to explore Punta del Este further with their rented car.
Day 2: La Barra, Jose Ignacio, and Punta Ballena
During our second day, we had a unique opportunity to join Irene and Gabriele and explore the city and surroundings in a car. As you know, we haven’t rented a car yet in South America so it was a different way of discovering new places for us.
We started our day by walking on the beach of La Barra city which is located a few kilometers from Punta del Este. It is very popular for surfing and the party as the small town attracts mainly young people.
We continued our trip to the fishing village Jose Ignacio which offers beautiful beaches and much more. The main landmark of this city is the Lighthouse which it’s possible to visit all year round (between 1 pm and 3 pm is normally closed). The Brava beach is perfect for a day of relaxation so we stopped for a few hours to enjoy it.
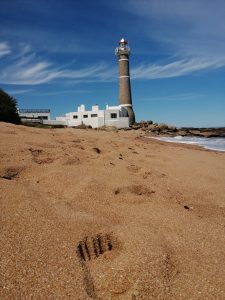
Lighthouse Jose Ignacio
On the way back to Punta del Este, we stopped at the International Sculpture park created by the Fundación Pablo Atchugarry. Pablo Atchugarry is a contemporary Uruguayan sculptor and his works are included in many major collections. The park offers visitors a natural setting for all sculptures where you can find many national and international artists.
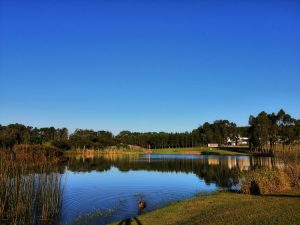
Fundacion Pablo Atchugarry
To see the sunset, we rushed to the Punta Ballena, which is the perfect spot for it. You can see the picture below which speak for itself.
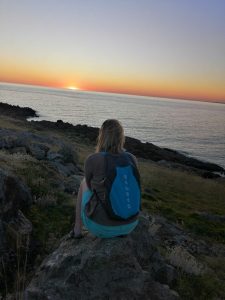
Sunset Punta Ballena
Where to stay in Punta del Este
During the whole stay, we chose a budget accommodation RocaMar Hostel Boutique. The hostel is located a bit far from the city center however it is a good value for the price.
WiFi: good signal around the reception, weak in the common areas and kitchen
Location: about 30min walk from the city center
Price: good for a double room with private bathroom
Extra info: There is a very nice area with a bar in the middle of the hostel where you can relax, also the staff is mostly volunteers and all of them were nice and friendly.
Punta del Este offers many different types of accommodation, but mainly they are specialized in luxury boutique hostels or apartments where you can find all the comfort you need. To see al options in Punta del Este, click right here.
Getting back to Montevideo
The next day we headed back to Montevideo where our trip among the Uruguayan cost started. From Punta del Este there are buses every 30min for 300 UYU per person. We stayed one night in Montevideo before going up to Salto, North of Uruguay.
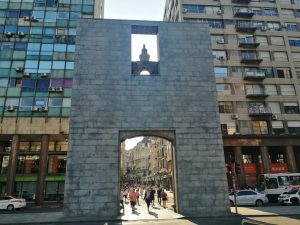
Montevideo
Where to stay in Montevideo close to Bus Terminal
As we only stayed one night, we were looking for accommodation close to the Bus Terminal and we found Amo Este Lugar hostel just about 100m from the bus station.
WiFi: great signal
Location: about 100m from the main Bus Terminal of Montevideo so perfect for travelling the next day
Price: reasonable for a double room with shared bathroom
Extra info: there is a kitchen with many utensils, so you can easily cook
Find more options where to stay in Montevideo, right here.
Salto
Our next destination was Salto which is bordering Argentina on the Uruguay river. We took a bus from Montevideo to Salto with Nacional Agencia company which takes 6h.
There are other bus companies you can use, however, we wanted to go in the morning and at 9.30 am the bus was perfect for us. The cost of the bus ticket per person was 1100 UYU in December 2019.
We mainly went to Salto city because we were heading to Iguazú Waterfalls and we needed to go Concordia in Argentina to catch a bus there directly to Iguazú. The bus from Salto (Uruguay) to Concordia (Argentina) works every day except Sunday and for this reason, we had to change our plans and stay only one day in Salto.
Day 1: Salto and Termas del Dayman
We arrived in Salto city in the afternoon and as it was Friday we had to catch the bus to Argentina the next day as there are no buses on Sunday. We wanted to visit the city and also Termas del Dayman and in the end, we managed to do both for one day.
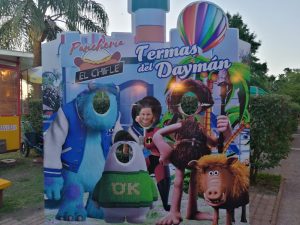
Termas del Dayman
We walked a bit around the city center in Salto, however, it was quite hot so we decided to head towards the Termas del Dayman with natural hot springs with hot and cold water.
From Salto city, you can easily take a public bus and you arrive in approx 20min/30min. During summer the bus goes every hour and the latest bus goes at 11 pm so make sure you ask the driver what time the bus goes back so you can come back to the city.
Termas del Dayman offers great relaxation if you like hot springs. You can find around 10 different pools with cold, warm and hot water. The entrance ticket costs 180 UYU per person which was a bit higher than we read at the official website. Most probably the price increases every season and for foreigners is always almost double the price than for residents. Anyway, the price is still cheap comparing to the price in Termas in Concordia Argentina, which we found out later on.
Where to stay in Salto
As we stayed only one night, we were looking for something close to the Bus Terminal as we had to catch the bus the next day. We stayed in Un Lugar para compartir which is located about 15min walk from the bus station.
WiFi: weak signal
Location: about 15min walk from the main bus station
Price: the cheapest option we found for a double room in the small house at the owners garden
Extra info: The owner was a nice lady, she gave us all the info about the Termas del Dayman and how to get there. If you want to cook, this place is not the best option as there is no kitchen just a small stove and kettle for coffee and tea.
Click here to see more options and availability in Salto.
The next day we caught our bus at 9.30 am direct to Concordia Argentina. We used Flecha bus company and the ride takes about 1h because you have to cross the Uruguay-Argentina border.
We were back in Argentina after two weeks in Uruguay, so this is where our travel guide for backpacking in Uruguay ends.
These are all the tips and recommendations on travelling in Uruguay on budget, so we hope you can see that there is a possibility of backpacking in Uruguay.
If you have any questions or you want to add something, don’t hesitate to comment below or contact us by email.
If you like our post and you would like to receive Bi-Weekly Travel and Food Tips, subscribe below to follow our adventures
Keep Reading our MOST POPULAR POSTS:
ONE-Way ticket to Travel the World
Our Ultimate Backpacking Checklist
Our Dream Travel, What is your Dream?
One Month Backpacking in Patagonia
PIN IT


[…] continue reading this post in English click here. Para leer este post en Inglés haga click […]
[…] You can read our post about backpacking in Uruguay with recommendations and tips on which places to … […]